Pages

Showing posts with label experiment. Show all posts

Wednesday, April 12, 2017

Color Dripping: Spring Flowers


 *This post contains affiliate links

Recently I purchased some Pipettes because my 4 year old likes to play in water.  I figured, amongst many other things, she could use them for water transfer and creating "potions" outside.  I also know they are great for various art projects and color blending.  While browsing Facebook I came across a beautiful spring art experiment from Fun-a-Day that inspired me to decorate for spring.  So I set to work, which included creating some liquid watercolors.  


While I prefer how vibrant purchased Liquid Watercolors  can be, I didn't have any on hand.  But I did have a bag full of dried markers I'd been collecting.  You can repurpose these old markers by placing their tips in water and allowing them to soak for several hours, or overnight.  Then you can store the created watercolors in small plastic containers.


After creating the watercolors, I cut some coffee filters into flower shapes.  The nice thing about coffee filters is they are thin, so you can cut a number of them at once.  When all was ready, I set out the flowers, watercolors, and pipettes (one for each color) for my preschooler to play with.  I used a plastic box lid to contain the mess as best as possible.  A tray or cookie sheet could also work.  Some kids like to really soak their art work, so keeping it from running all over the place is important for your own sanity.


Pipettes are a great tool for developing fine motor skills.  Toddlers may find squeezing and transferring the liquid difficult.  If this is the case, give them a paint brush.  It'll still create a lovely work of art.


There are several ways you can take this activity.  If you want to teach simple color blending, try using only two colors at a time:

  • yellow+red= orange
  • blue+yellow=green
  • red+blue= purple
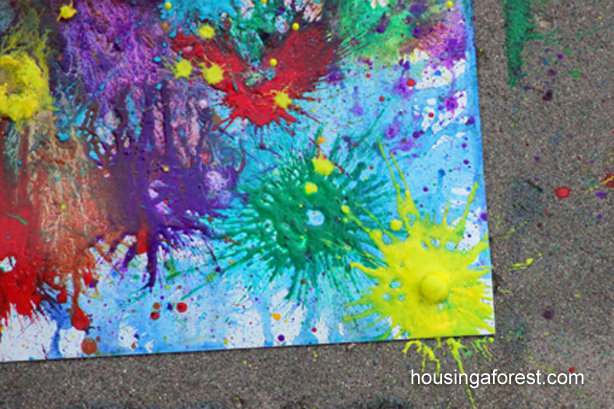
If you want to move beyond the basics, try multiple colors.  Some truly beautiful flowers can be created this way.  I explained to my daughter that it's best to mix the colors on the paper, rather then in the containers because otherwise you'll end up with all brown.  Of course, if your child is like mine, they will still test this theory.  I found if you use an ice tray for your colors, rather then giving them the storage containers, you'll waste less, and it can be easily dumped and replenished.  

As much as possible, stand back and allow your child to explore the activity.  It's OK to ask them questions about the colors they are blending but otherwise let them create.  Some may chose to not blend the colors.  That's OK too.  Sometimes the process is more important then the product.  


With Easter around the corner, we also painted some coffee filter Easter eggs.  Once all the flowers and eggs were dry, we hung them in the windows to catch the light and enjoy. 

Here's a list of what you'll need:
  • pipettes or droppers (paint brush for toddlers)
  • coffee filters
  • liquid water colors
  • Scissors (for cutting flower/egg shapes)
Have you used pipettes for color blending before?  Let me know how you did and what you think of this activity.  


Wednesday, August 15, 2012

It's Playtime: Exploding Art (Enough Said!)

I like things messy....art wise.  I can't always get my kids in on the action though.  My son attracts dirt like Pig Pen but heaven forbid he gets paint on his hands.  He won't even play with Obleck (or goo, or what ever you call cornstarch and water in your home).  My daughter is now a "trained" artist and is above making a mess (although leaving her mess after painting is a different story).  Well this week on It's Playtime I'm featuring the ultimate messy art.  This project rolls art, science, outdoor, and messy play into one package.  So without further ado I give you.....


 I'm actually kind of jealous of this project in the "why didn't I think of that" way.  My son's preschool teacher made rockets using film canisters and Alka Seltzer and the kids loved it!  Why didn't I think to take it further? Well Kudos to Housing a Forest for taking it further and creating some fantastic fun.  Go and check them out...right now!  What are you waiting for? Go!!!!

If you were featured this week, don't forget to grab your special "featured button."  


These activities plus more can be found over on the It's Playtime Pinterest Board.  Happy Pinning! 
Now, on to this weeks play date! 
It's Playtime is a community and Thursday link-up hosted by:

* Rachele : Messy Kids (That's me!)
* Anna : The Imagination Tree
* Rachel : Quirky Momma
* Jamie : hands on : as we grow
* Jenny : Let the Children Play

How to Play :
* Link up a post about a playful learning experience enjoyed by kids.
* Give us love and pop a button into your post/blog. Invite your readers to the weekly play date!


* Stop by one of our blogs every Thursday and add your link about play. Your link will show up on each of the blogs in the It's Playtime community.
* Each week the playtime hosts will choose favorite posts to feature. (By linking you are giving us permission to use an image and link to you, if featured.)
* Be sure to visit some of the links that catch your eye. Commenting on posts that you find interesting or inspiring is a wonderful way to develop your own playful community.

Sunday, July 29, 2012

Ice Painting with Kool-Aid

Recently I shared our Kool-Aid Ice Play using frozen Kool-aid and paper towels to create some messy art and play.  Soon after that, my son asked to play with Kool-aid ice again.  I didn't have any cubes prepped so I took what we had and changed it up a bit.        

I placed a sheet of construction paper onto a cookie sheet.  My son loves orange so he always chooses that color.  Then we carefully sprinkled several colors of Kool-aid over the paper.  I let Michael help me with this as it's a good way to teach control.  

Then I gave him an ice cube.  He moved it around the page leaving wet and colorful trails as he did.  

But Kool-aid painting isn't just about what's on the paper.  It's the whole sensory experience!  He had to check out what was on the ice...
then of course he had to taste it...
and stick his fingers into the powder to taste that too.   

Once everything was touched and tasted, he was done.  For my son, as it is with many kids, especially boys, art is about the experience rather then the product (process art).  Michael could care less about what he created; for him it was all about playing and tasting ice and Kool-aid.    

Monday, January 16, 2012

From Art to Science: Solids and Liquids


I wanted to paint the other day, but my son had other ideas.  He asked to melt crayons again.  Thrilled he was interested in creating anything, I plugged in my griddle and prepared to grant my son some melty fun.  

 He started by drawing, first a single crayon, then a handful of crayons.  
Then he decided to experiment.  He wanted to find out what would happen if he placed crayon pieces onto the griddle.  He was excited to see them melt into puddles.  Suddenly this art project turned into a lesson in solids, liquids, and heat.  When we made applesauce, we discussed heat and it's power to change things.  But apples don't puddle, only soften, so we decided to experiment with other items and discover what would turn into a liquid and what would remain solid.
We started with butter, then added a chocolate chip.  
But I also wanted him to see that not everything will melt, so upon my suggestion, we added a carrot and a grape.
After a few minuets, Michael noticed the carrot and the grape weren't doing anything exciting, and the butter was melted, so we added an ice cube too.
 He watched intently as the ice melted, the butter spread, the chocolate began blending into the mix, and the carrot and grape remained the same.  I asked him to show me which items were liquid and which were solid.  Then as suddenly as the lesson had begun, it ended (4 year old attention span).  We'd enjoyed some impromptu science...
while making a pretty cool piece of art!  

Additional: 
Later, while reading The Snowy Day by Ezra Jack Keats, we discussed the snowball Peter places into his pocket.  I asked Michael what would happen to the snowball in the house.  He said, "it will melt".  When asked why, "because it's warm in the house".  By George, I think he's got it!

LinkWithin

Related Posts Plugin for WordPress, Blogger...