Pages

Showing posts with label cooking. Show all posts

Saturday, March 30, 2013

Cooking with Kids: Salted Caramel Bunny Bait


Yesterday was my mom's group Spring Fling.  We gathered together, shared food, and let our kids go wild in a park.  Oh and there was an Easter egg hunt.  Somehow I missed it though because I was watching babies...plural...more then one.  Only one was mine.  But it's O.K.  My kids are spaced 5 years a part.  This makes things easy for me at playdates because my older kids are capable of enjoying the park on their own.  But many of my friends aren't as lucky; their kids are 3, 2 or less years apart.  Talk about a challenge!  My son is enough of a challenge, I couldn't imagine him being 2 while caring for the baby as well.  I'd be crazier then I am now.  I don't know how my friends do it.  A lot of drinking maybe....  

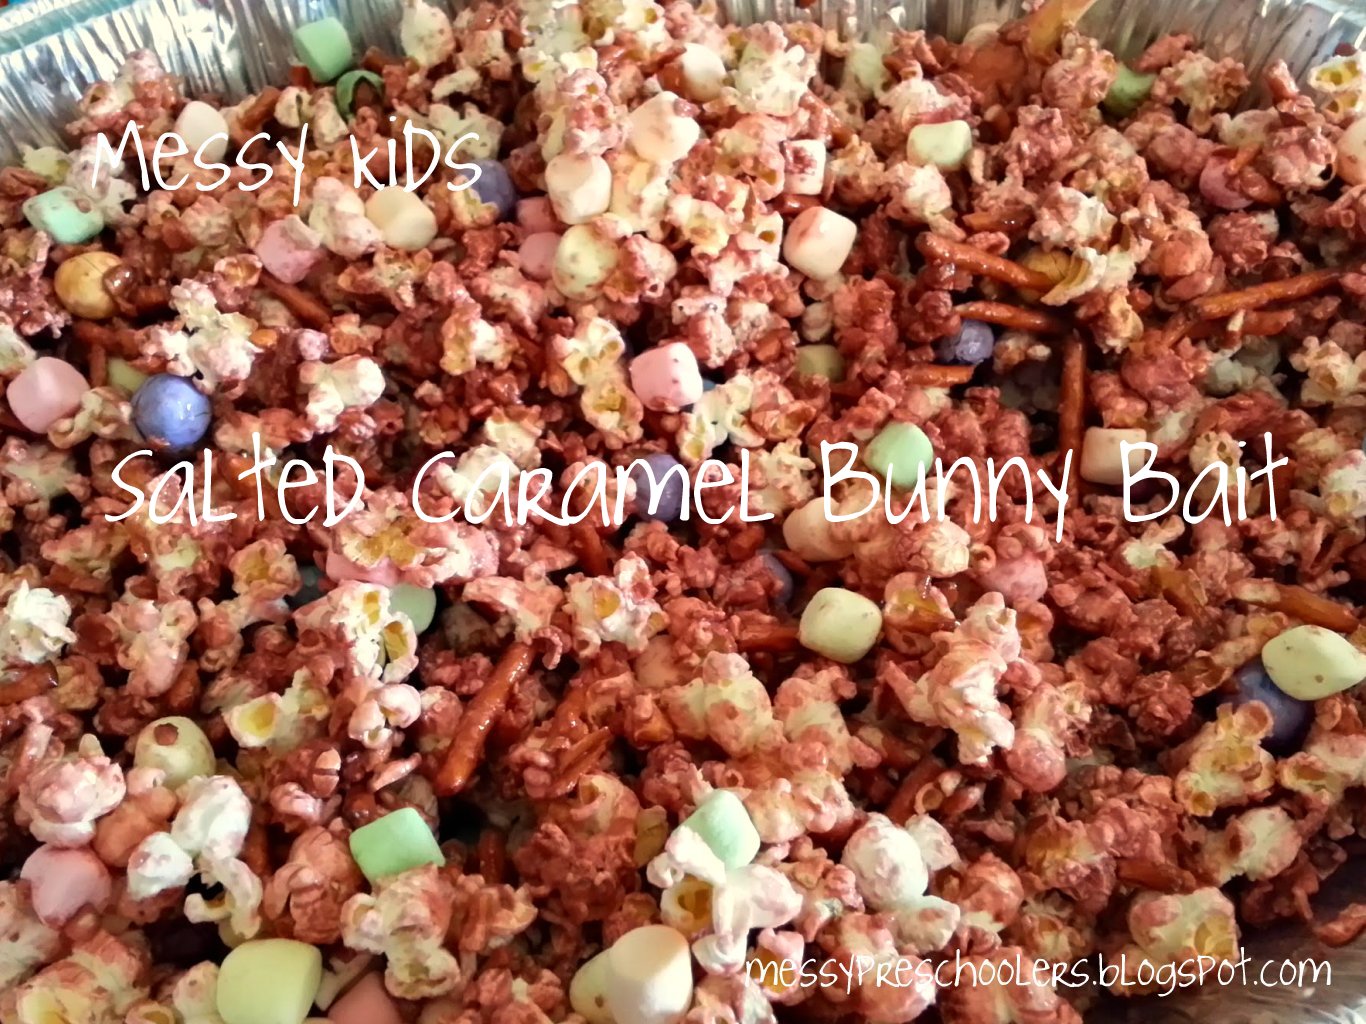
With that being said, sometimes my son wants to help me in the kitchen.  Yesterday was one of those days.  I had to make a dish to take to the Spring Fling so after some research I'd decided on Salted Caramel Easter Popcorn (or Bunny Bait).  You can find the recipe at two peas & their pod.  There was plenty my son could help me do.  

We needed some crunched-up, salted pretzels.  I dumped a bunch of pretzel sticks in a Ziploc bag, gave my boy a meat tenderizer, and let him go at it.  He was quite proud of his job.  
My son loves marshmallows.  He was excited to measure the amount we needed and stir them into the hot sugar mixture.  He also liked adding the food coloring.  
And what kid could resist adding the M&M's to the mix?  A taste test is extremely important.  

Some tips:
  • Use white mini marshmallows for melting in the recipe.  I had pastel colored and well, when they melt together, they turn brownish.  Then we added some pink food coloring which of course, made it worse.  Then we added some purple, which turned the whole mess puce.  So if you don't want vomit colored popcorn, I'd go with white marshmallows.  
  • If the marshmallows don't melt right away, place the pot back on the stove and stir constantly until hot.  Depending on the brand of marshmallows they won't become creamy until you begin stirring the mixture into the popcorn.  
  • If you can't tell, I'm a little marshmallow crazy, but you can add the colored ones along with the pretzel M&M's.  At that point it adds more Easter color.  
  • I forgot to get heavy cream.  Coconut milk works too!  
  • My mixture was pretty sticky.  I don't know if that's normal or if it's because I didn't lay it out on a cookie sheet to set.  I stuck it in the fridge to cool instead (I wait until the last minute to make things; it's so bad!).  It still tasted great! In fact more moms ate this stuff then kids.   
  • Place the popcorn out on Easter Eve as bunny bait.  Just a little something to add to the magic.   
  • This is how we popped our popcorn, give it a try:

I'm sorry, I really wanted to post the recipe here (citing the source of course) but I believe in giving credit where credit is due.  They other blogger deserves the traffic too!  

What are you making special for Easter?  Share in the comments below.  


Saturday, August 25, 2012

A is for Apple


School has started and fall is fast approaching.  It's time to break out the alphabet and the apple activities for back to school fun!  

We started our theme with a simple letter trace.  It's great for developing letter recognition and fine motor skills, especially in early writers.  I drew a letter A on a piece of construction paper and allowed my son to choose from markers or crayons (both would have been OK too) for tracing.  Once Michael was done, he pasted on a few apples I had cut for another project.  

  For more letter recognition and word association, Michael glued apples to the letter A.  

We took our art outside for some simple, apple tree inspired easel painting.  I gave Michael red and green paint, along with a brush and a cork and set him free....
 Michael's creation
Later, his older sister joined the fun.

We also made some applesauce together.  Yum, yum!

For more apple activities check out my Apple Themed Pinterest Board!    

Books you can read:


*Disclaimer: These activities are a year old.  Often, I do things with my kids, take pictures, but never get around to blogging what we've done.  I'm lazy, I'll admit it.  You know, I sit around, doing nothing all day....Ok, not really.  I'm usually running my son to playdates, my daughter to art class, assisting with homework, and doing pesky chores like laundry, vacuuming, and cooking.  I figure though, since I'm pregnant and doing less with the kids at the moment, I can catch up on things we did last year so the pictures don't go to waste :)   

This activity shared with:
   
No Time For Flash Cards

Sunday, January 29, 2012

From the Heart Waffles


Breakfast is the favorite meal in our household, especially on weekends.  I make crepes, muffins, cinnamon rolls, and waffles.  So this morning I asked my son what it was he wanted me to cook.  I suggested blueberry pancakes but he said, "no, blueberry waffles".  We haven't tried this before so it was worth a shot.

As I was making the waffles, I thought about how I could make them special.  My son, like most kids, loves when I make cut-outs of anything.  I remembered I had a great big heart cookie cutter in the cupboard, perfect for a big waffle.

Once the waffles were finished baking in the waffle maker, I carefully peeled them off, placed them on a flat surface, and pressed the cookie cutter down to create perfect heart-shaped waffles.  I set the trimmings aside because in my house, waffles are snacked upon all day long.

My son was thrilled with the fun shape, so much so he didn't want me to cut it into bite size pieces.  Unfortunately for him I had already covered them with syrup and didn't want him using his hands (which he did anyway).  He also wouldn't let me take a picture of him enjoying the yummy creation.


Here's what you'll need:
Waffle Maker
Bowl
Whisk
Wooden Spoon
Butter or Cooking Spray

For the Waffles:
1 3/4 cups all-purpose flour
1 tablespoon baking powder
1/4 teaspoon salt
2 eggs
1 3/4 cups milk
1/2 cup cooking oil
1 cup or so blueberries (frozen or fresh)

Combine all ingredients in a mixing bowl.  Stir mixture first with a wooden spoon, then with a whisk until all ingredients are well combined.  Do not overmix!  Batter should be slightly lumpy.  Fold in blueberries until well combined.

Coat waffle iron with butter or cooking spray.  A heavy coat will be needed because the blueberries stick!  The size of your waffle maker will determine the amount of batter you pour onto the grids.  I use about 1 cup (my maker is on the larger size)

Cook your waffle according to manufactures directions.  Use a fork to remove waffle off the grid.  Place on a flat surface and cut waffle with desired cookie cutter, in this case, a heart.  Serve with butter, syrup, blueberries, whip cream, or any other topping of choice.

And of course, serve with LOVE.

Recipe variation based upon:
"Waffles." Recipe. Better Homes and Gardens: New Cook Book. Iowa: Meredith Corporation, 1989. 152-3.

Monday, September 19, 2011

Cooking with Kids: Applesauce


School is back in session and everybody is dusting off their apple themes for fall.  This year, I'm homeschooling my son so, I too, have had to brush off my teacher hat and figure out what the heck I'm going to do.  My son is not one for art, but he loves cooking, so I've made it a point to include several apple recipes in our homeschooling schedule.  Last week we started off easy and made one of my son's favorite foods...applesauce.

We used an extremely simple Applesauce recipe from Allrecipes.com.  I love this website because you can change the serving size and with a click of a button, the recipe will recalculate your measurements.  I chose 1 serving for this project.  We had several apples to choose from; Michael chose a green one.    

We began by cutting our apple.  We used the apple slicer together, then I gave Michael a safety knife (otherwise known as a pumpkin carving knife) so he could try to cut the apples into chunks on his own.  Apple peel has a lot of nutrition, so I left it on.    
 Then we placed the apples into a pot and added the sugar and cinnamon.   
 Michael loves Sid the Science Kid.  There is an episode about heat and change where Sid's preschool class makes applesauce.  Michael remembered the kids trying to mash the apples before they are cooked and wanted to try it too.  He discovered they were too hard to mash.  We talked about how heat will change the apples, making them softer, and we'd try again after the apples had cooked.  Then I added a bit of water to the apples and turned the heat on.  
 Michael was excited when the liquid started boiling.  
 Once the apples were nice and soft, Michael mashed them. 
 I learned that when you choose to hand mash apples, it is a good idea to remove the skin.  Had I thrown the apples into a blender instead, leaving the peels on would have been OK.  
 Yum, yum, time to eat!  Michael enjoys his tasty creation (except the peel).

Shared with:

Photobucket"/>

Sunday, July 31, 2011

No Flour Playdough

*This post contains affiliate links 

A Facebook fan of mine asked me about making rice four or flour-free playdough for those who are gluten sensitive.  As I am lucky enough to have a family without food allergies, I turned to my network of preschool bloggers.  Dawn from chasing the seasons shared a wonderful recipe with me using only baking soda, cornstarch, and water.  This dough is silky, smooth, and easy to mold; a nice addition to sensory play.     
Cornstarch, baking soda and water make up the basic ingredients of this lovely dough.  You can also add color (we used a bit of tempera paint) and scents (essential oils or cooking essences).  
 First we added the color and orange oil to the water.  

 We placed the baking soda into the pot.
 Then we added the cornstarch.  Michael likes to touch everything so I encouraged him to feel the cornstarch.
I showed Michael how it can make his skin soft (makes a great body powder).  
My son, who has no problem being dirty all day long, was distraught by the cornstarch on his arm.
After the dry ingredients were added, Michael poured in the colored water.  
We moved the pot to the stove where we began cooking the dough.  Michael quickly became bored and left me to stir.  
The completed dough, still warm to the touch.  

Michael enjoyed sticking his fingers in the warm dough.  Soon after he asked to play outside with Playdough...the store bought kind!  I'd hoped to capture him playing with the dough on another day, but alas, my daughter played with the dough and left the bag open, causing the dough to become dry.  And of course, she played with it at a moment I was unable to shoot pictures of her enjoying it.  I suppose I'll just have to make it again another day!    

Recipe: 
  • 2 Cups Baking Soda (1 box)
  • 1 Cup Corn Starch
  • 1 1/2 Cups Water
  • Color (we added a bit of tempura paint until we received the color we desired)
  • Scents (optional): We added Orange Oil giving the dough a nice aroma
Add color (and scent) to water.  Combine baking soda and cornstarch in a pot, then add water to the powdered mixture.  Cook on medium heat until the dough forms a ball.  Cool and knead.  

**A gross side note- While stirring the dough on the stove my son and I discovered bits of bug floating around in the goo.  Seems a pincher bug (or bugs) crawled into the paint somehow.  Mind you, I've had this particular bottle of paint for over 8 years!  It's never dried out but had apparently captured insects!  What was left was quickly discarded and I had to spend several minuets fishing bug parts out of our dough.  The moral of the story is beware of your paint storage area...oh and in case you don't know, cockroaches will eat dried tempera paint so beware of what you store that you have painted (classroom decorations and such)!  Blah!      

This posting linked with:


GettingMessyWithMsJessi
   

LinkWithin

Related Posts Plugin for WordPress, Blogger...