Pages

Showing posts with label crayons. Show all posts

Tuesday, February 7, 2012

Distressed Art: Paper Bag Challenge

Once again Tinker Lab has challenged and we've answered.  This time the challenge was...paper bags.  Of course one thinks of puppets and goodie bags.  But there is so much more out there.  My Messy Kids and I decided to try our hands at distressed art work using paper grocery sacks.  Here's how it went:

 You begin by cutting a side from the grocery sack.  Then wad the paper up, crunching it as much as possible.  Open it and begin drawing.
Michael insisted I draw with him.  
 Then be sure to leave your camera where your 4 year old can reach it...
 Next, wad the paper some more, then iron it flat.  Wad and iron, wad and iron, over and over until the art work is soft and distressed (or until your child decides he or she is done)
 It wasn't long before my son decided he was done....

 Let's see how my daughter does...
 Wad, wad, wad...
 Iron, iron, iron..."mom I think I'm done with this." (which really means, "I want to go watch T.V.")
 Ariel's kind of distressed art.  Some of the crayon melted!  

 When performed in it's entirety, this project creates soft, distressed paper.  If homeschooling, use it in conjunction with studying Native Americans.  Start by ripping a piece of paper from the bag.  Instead of free drawing, provide early N.A. symbols. for children to copy.  Then they wad and iron, wad and iron. The more wadding and ironing, the softer the paper becomes.  In the end, it will look like a piece of animal pelt with N.A. symbols painted on.  Since my kids bailed on me, hopefully, you get the idea.  
Tinkerlab
   

Monday, January 16, 2012

From Art to Science: Solids and Liquids


I wanted to paint the other day, but my son had other ideas.  He asked to melt crayons again.  Thrilled he was interested in creating anything, I plugged in my griddle and prepared to grant my son some melty fun.  

 He started by drawing, first a single crayon, then a handful of crayons.  
Then he decided to experiment.  He wanted to find out what would happen if he placed crayon pieces onto the griddle.  He was excited to see them melt into puddles.  Suddenly this art project turned into a lesson in solids, liquids, and heat.  When we made applesauce, we discussed heat and it's power to change things.  But apples don't puddle, only soften, so we decided to experiment with other items and discover what would turn into a liquid and what would remain solid.
We started with butter, then added a chocolate chip.  
But I also wanted him to see that not everything will melt, so upon my suggestion, we added a carrot and a grape.
After a few minuets, Michael noticed the carrot and the grape weren't doing anything exciting, and the butter was melted, so we added an ice cube too.
 He watched intently as the ice melted, the butter spread, the chocolate began blending into the mix, and the carrot and grape remained the same.  I asked him to show me which items were liquid and which were solid.  Then as suddenly as the lesson had begun, it ended (4 year old attention span).  We'd enjoyed some impromptu science...
while making a pretty cool piece of art!  

Additional: 
Later, while reading The Snowy Day by Ezra Jack Keats, we discussed the snowball Peter places into his pocket.  I asked Michael what would happen to the snowball in the house.  He said, "it will melt".  When asked why, "because it's warm in the house".  By George, I think he's got it!

Friday, December 30, 2011

The Messy Kids Top 5 Posts of 2011

This past week, I've noticed a lot of other bloggers posting their top 10 posts of 2011.  Just to be different (and because I've only been around for a little less then a year), I'm going to share the Messy Kids Top 5 Posts of 2011.


And the #1 Messy Kids post of 2011....No Flour Playdough!  

Thank you for being a part of my first year as a blogger and I look forward to sharing so much more with you in 2012!  

Thursday, August 25, 2011

It's Playtime: Keeping it Simple

As teachers, homeschoolers, and parents, sometimes art projects seem to get away from us.  We tend to turn them into a big ordeal, or maybe we don't do them at all because we're avoiding all the work. But process art projects SHOULD be easy.  When I taught preschool, my motto was, "if it takes more then 5 minuets to set up, then you are doing too much."  For process art, you should generally open a cupboard, assess your supplies, and put together a project in a snap.  Kids are easy.  Mess is good.  Keeping it simple is key!

This week on It's Playtime, I'm featuring blogs who kept it simple when it came to art.  Because as parents and teachers, who really has time to complicate things?  

What could be simpler then painting a rock?  Playful Learners shared how Decorating Beach Pebbles can turn from a fun beach activity to an easy art project at home.  I love the simplicity of opening an old magazine to catch the mess rather then spreading newspaper all around the table and floor!  

How about some Magic Painting?  "Magic?" you say, "how is that simple?"  Well who hasn't done crayon resist painting at least once in their lives?  I spent a good portion of my elementary school years painting underwater scenes and haunted houses at home simply because I LOVED crayon resist painting!  Well, why not try it in preschool?  That's just what Pre-school Play did and their kids loved it!  Their paintings may not have been full of fish and mermaids, but they certainly were magic...and simple!  

Creativity My Passion used a Toothbrush as a Paintbrush for their art!  Who doesn't have an old (bleach gets the germies out!) or extra toothbrush laying around?  And Esther went beyond the toothbrush by turning it over and trying Tongue Cleaner Stamping.  Two projects in one!  Check out her blog because from there, she used the toothbrush for several more projects as well.      

If you were featured this week, don't forget to grab your special "featured button."


Now, on to this weeks play date! 
It's Playtime is a community and Thursday link-up hosted by:

* Rachele : Messy Kids (That's me!)
* Anna : The Imagination Tree
* Rachel : Quirky Momma
* Jamie : hands on : as we grow
* Jenny : Let the Children Play

How to Play :
* Link up a post about a playful learning experience enjoyed by kids.
* Give us love and pop a button into your post/blog. Invite your readers to the weekly play date!


* Stop by one of our blogs every Thursday and add your link about play. Your link will show up on each of the blogs in the It's Playtime community.

* Each week the playtime hosts will choose favorite posts to feature. (By linking you are giving us permission to use an image and link to you, if featured.)
* Be sure to visit some of the links that catch your eye. Commenting on posts that you find interesting or inspiring is a wonderful way to develop your own playful community.

Monday, August 22, 2011

Crayon Melt

One of the activities I remember fondly from my early school days was melting crayons on a hot plate.  With all the issues of safety, I don't think it's a common project these days, at least not in Kindergarten, but I have seen it popping up in the homeschool and preschool networks all over the web.  I decided it was time to take a risk and let my son try this fun activity.  
Unfortunately, I don't have a flat electric griddle.  I wish I did for the sole purpose of this project, but I had to work with what I had; my George Foreman grill with interchangeable plates.  I attached the griddle plate and covered it with foil.  I wasn't sure how messy my son would get.  Once it was warmed, I placed the construction paper over the foil.  
 Michael enjoyed watching the crayons melt over the paper.  
 One crayon just wasn't enough!  
The finished product.

My son is a boys boy; always going, always busy.  Projects never last for very long but he does seem to enjoy them.  This was a simple project to pull out that didn't require a lot of set-up so the fact that he finished in 5 minuets wasn't a big deal.  I definitely want to try this again when his sister is around!

Shared on:

Thursday, August 18, 2011

It's Playtime: Back to School with Fun Things to Do


I know many of you teachers, homeschoolers, and unschoolers out there are back to school already.  You've been preparing for months but you still want some ideas stored away for a rainy day, or maybe just some newer ideas to add to your usual lesson plans.  So here you go!  This week on It's Playtime I bring you some great learning ideas posted during last weeks play date.  Enjoy, share, and add your own!  We are so glad you came to play.  

 I Heart Crafty Things put together this great lesson plan revolving around the book, Red Light, Green Light by Anastasia Suen.  She includes color sorting, math, language, and fine motor skills.    Perfect for boys and girls alike!  

Simple and beautiful, this fine motor skill activity from Share & Remember involves small suction cup bath mats and jewels.  Preschoolers will enjoy creating patterns and designs with an underwater theme.   
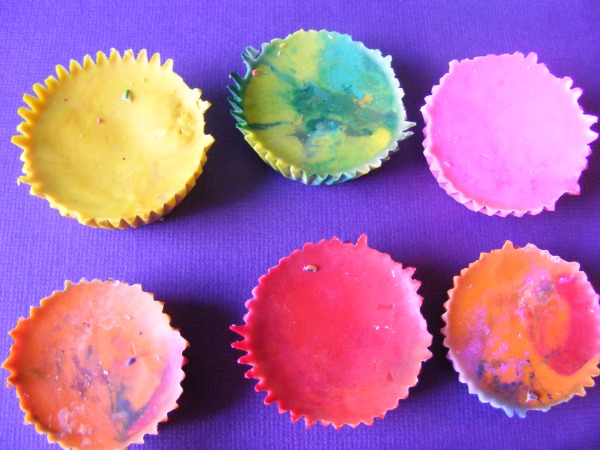
  Keeping Life Creative shared a DIY Recycled Crayon post, melting similar colored crayons together in cupcake papers, creating new, peanut butter cup shaped crayons.  While over at Slightly Nerdy. Sometimes Cool. they used Recycled Crayons to create their own rainbow crayons.  
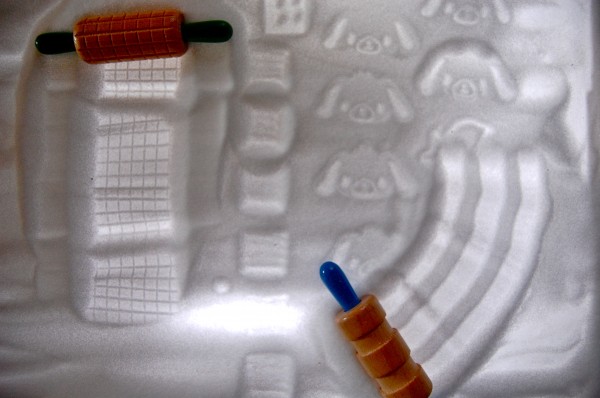
Over at Tinker Lab, Rachelle's been working hard on her DIY Light Table and adding a different element to the learning experience...salt!  I love the prints and patterns that adding salt to the table creates.  

While on the discussion of Discovering Light, Beansprouts Preschool Blog took a boring, old sensory table full of cornstarch and shells and added some beautiful colored lights, creating a whole new sensory experience!

If you were featured this week, don't forget to grab your special "featured button."


Now, on to this weeks play date! 
It's Playtime is a community and Thursday link-up hosted by:

* Rachele : Messy Kids (That's me!)
* Anna : The Imagination Tree
* Rachel : Quirky Momma
* Jamie : hands on : as we grow
* Jenny : Let the Children Play

How to Play :
* Link up a post about a playful learning experience enjoyed by kids.
* Give us love and pop a button into your post/blog. Invite your readers to the weekly play date!


* Stop by one of our blogs every Thursday and add your link about play. Your link will show up on each of the blogs in the It's Playtime community.

* Each week the playtime hosts will choose favorite posts to feature. (By linking you are giving us permission to use an image and link to you, if featured.)
* Be sure to visit some of the links that catch your eye. Commenting on posts that you find interesting or inspiring is a wonderful way to develop your own playful community.

LinkWithin

Related Posts Plugin for WordPress, Blogger...