Pages

Friday, March 18, 2011

I Ain't Gonna Paint No More!

I am a big believer in messy play.  I was the teacher who gave the kids a bunch of stuff to glue and paint without a smock or put flour in the sensory table for exploration.  The bigger the mess, the more fun kids are having, right?!  Well, a few years ago I purchased a set of books with audio CDs from Scholastic, with no knowledge of the titles they sent me.  In that set I found the book that fits me most, I Ain't Gonna Paint No More! (Ala Notable Children's Books. Younger Readers (Awards)).  I always wanted to create a lesson around it, so now I've got my own blog, that's exactly what I'm going to do!

Although you can purchase the book on it's own, I recommend the set with the audio CD.  The author, Karen Beaumont, has taken the song, "Ain't Gonna Rain No More" and has written a fabulous story to match the tune.  A childish voice sings the story on the CD.   

The synopsis of this story is a child who enjoys painting...just a little too much.  Through the use of rhyme the child paints each part of his body more colorfully then the last.  David Catrow illustrates this book with fun and flare.

Lesson Ideas    

Literacy: While reading (or listening) to the story, see if the children can guess what the next part of the body is by simply listening to the rhyme (i.e. "Well there ain't no harm if I paint my......arm...").  The audio CD does pause slightly before naming the body part to allow for this.  If your children are a bit older, see if they can think of other words to rhyme with the body parts.

Art: Provide the children with a set of face paints.  Let them paint their arms and legs (or the arms and legs of their friends).  If you are uncomfortable with this, trace their hand and arm on paper and let them decorate it how they choose.


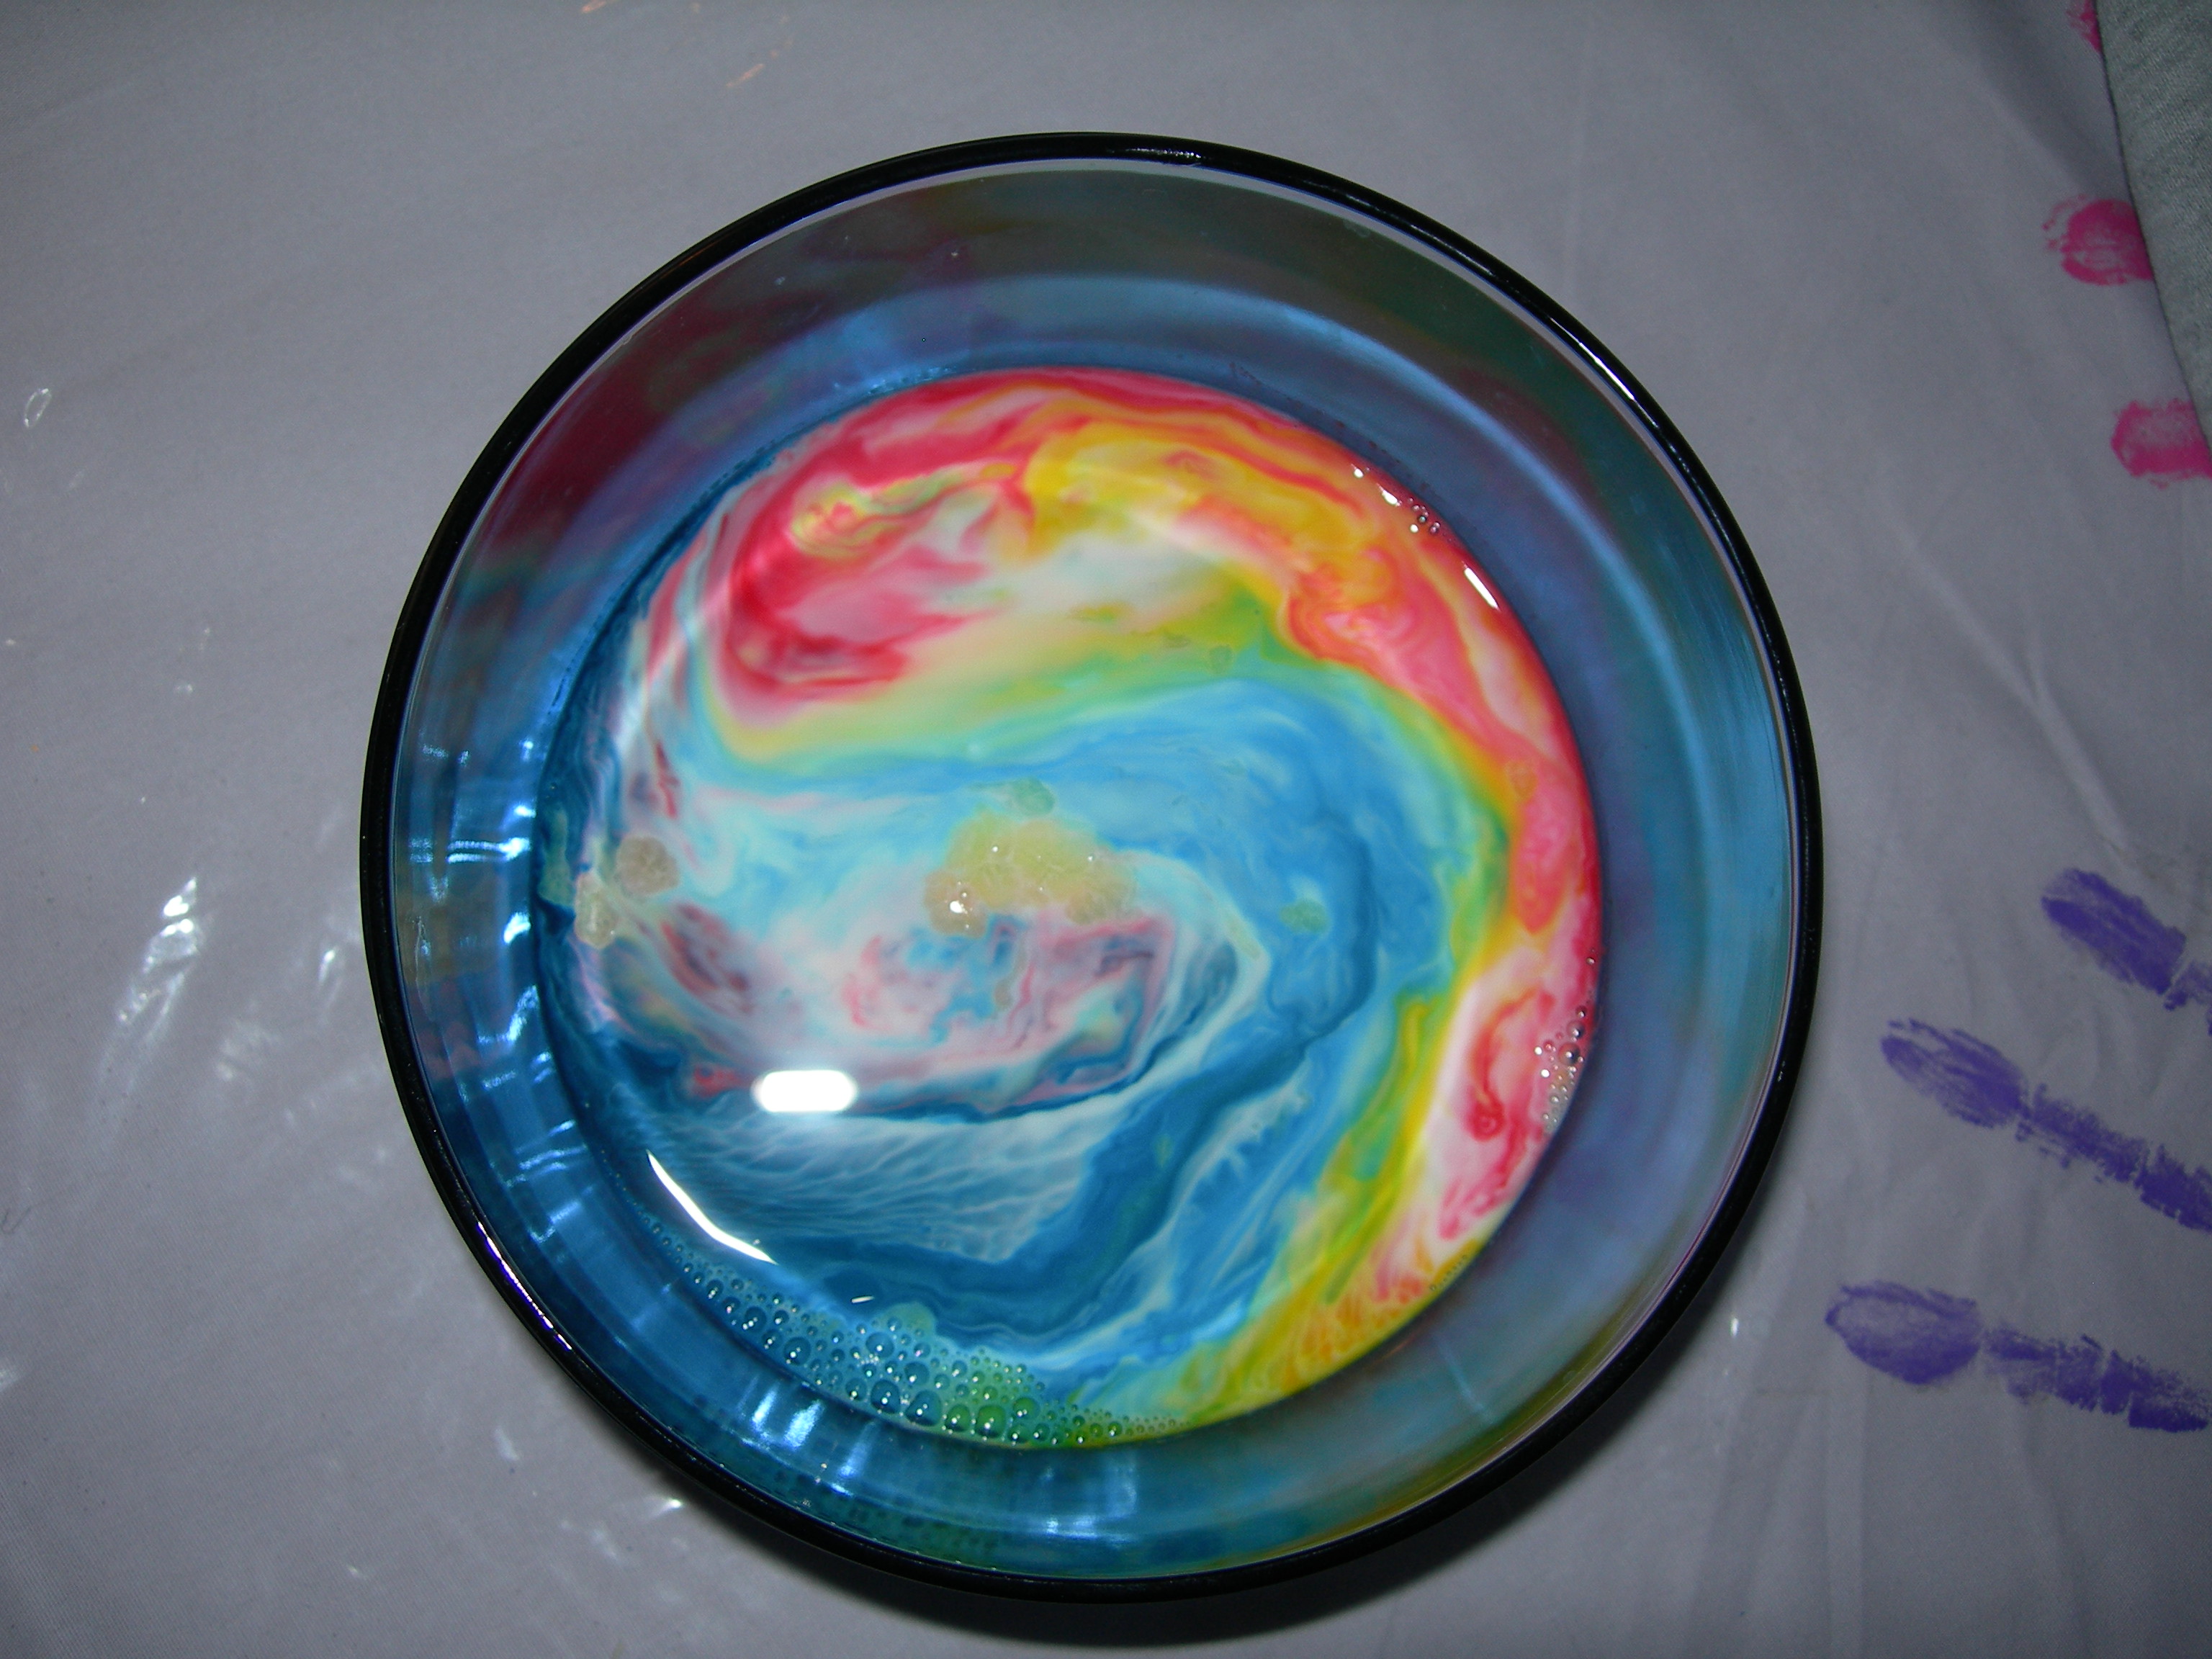
Science: Rainbow Milk
Outdoor: Provide the children with large paint brushes, rollers, and water so they can "paint" outdoors.  Allow them to "paint" the sidewalk, building, play structure, bikes, etc.  Give them freedom to explore.

Math: Patterns One illustration in the book is of the child's leg painted like an "Easter Egg".
  •  Cut and laminate a "leg" shape (or an egg).  Design pattern pieces the children can place on the "leg" in the pattern of their choice.
  •  Provide pipe cleaners and beads for patterning.  Make a loop on one end of the pipe cleaner to prevent the beads from falling off.   
  • Make Fruit Loop Necklaces 
I hope you and your children enjoy this book as much as my preschoolers and I did.  Now that I am home, my son and I listen to this story on a regular basis.  It has become one of his favorites too.  

What lesson ideas do you have for this story?  Feel free to link and share!

Shared on:

5 a day books

Sunday, March 13, 2011

Rainy Day Activity Course

Stuck inside on a rainy day?  Try making an activity course from items you have lying around the house.  Boxes?  Tubes?  Laundry baskets?  Anything can be used if you just know how to include it.  Here is what I created to keep my kids from going stir crazy.

I am blessed with a long hallway perfect for activities like this one.  I started the course with a ring toss.

After the ring toss, I hung a balloon from the ceiling.  The kids had to jump off the stool and hit the balloon.  I placed pillows on the floor just in case.  

Then the crawling tunnel.

After the tunnel, another balloon.  This one a little lower so it could be reached without a stool.  My daughter added the pillows.  I guess falling onto pillows was more fun then I thought.  

Then I placed "stepping stones" which led to some poppy paper (I'd saved from a package).  

The kids had to hop unto each "stepping stone" then jump onto the poppy paper.

The course ended with a rocking horse.  

Sure, you may not have a ring toss or a tunnel lying around, but think of what you do have.  The idea is to use your imagination and have fun.  Ask your kids what they want to add.  My daughter came home from school and immediately made changes of her own.  My son decided the balloons and the tunnel were the best part and only played in those areas.  When he was finished with one game he moved onto the next: 
  Shooting the balloons with his Nerf gun!

Some basic ideas:
  • Construction or printer paper makes great "stepping stones".  Just watch out for the hot lava below!  For an educational twist, write numbers or letters on them.  
  • Don't have a tunnel?  What about a card table?  Drape a cloth over the top and you have yourself a "tunnel" or "cave."
  • Laundry baskets have all sorts of uses.  If you have two kids, they can take turns pushing each other around.  Or get yourself involved and push your child across "the moat."  Turn over a laundry basket and it is great for jumping from or hiding under.  
  • Balloons are great to keep on hand.  They can be hung, tossed, and drawn upon.  When our balloons fell down, they became puppies on leashes (my daughter's idea).    
What items could you use for an activity course?  Do you have anything unusual?  Do you teach preschool?  What could you use in a school setting?  Feel free to share your ideas; I'd love to hear them!  

Shared with:

featured at hands on : as we grow  

Wednesday, March 9, 2011

Celebrate St. Patrick's Day

 St. Patrick's Day is fast approaching, so I decided to compile a list of ideas, some my own, the rest from other fantastic bloggers, to share with those around me.  Think of it as a one stop shop for ideas from around the net!

Science:
  • Shamrock Crystals from Housing a Forest  
  • Green Carnations: Purchase several white carnations.  Fill a clear vase (or several) with water and add several drops of green food coloring to the water.  Trim the stems of the carnations and place them in the vase(s).  Within several hours the carnations begin to show a green coloring.  Over several days they should turn a nice shade of green (or at least the edges of the petals will turn green).  Explain to the children that plants drink water to stay alive.  The water moves from the root system up the stem and into the blooms.  The technical term is transpiration. Don't be afraid to use this term.  You'd be surprised what the kids will retain!  
Literacy:
  •  Read The Night Before St. Patrick's Day (Reading Railroad) by Natasha Wing and The Luckiest St. Patrick's Day Ever by Teddy Slater.  After wards talk to the kids about Leprechauns.  Ask them questions and write down the answers.  Then have them help you design a Leprechaun trap.  Ask them what they think they will need, what it should look like, and anything else you can think of.  Older kids can try to draw a picture of their trap.  Then over several days, build a trap so it will be ready for the big day (don't forget to take pictures!).  After that, what you do with it, is up to you.  I suggest pretending the Leprechaun got away but maybe he left something for the kids? 
  • How to Catch a Leprechaun from Happy Home Fairy: Directions, ideas, and several different Leprechaun traps to share with your class or child.    
  • Head over to Teaching 2 Mommies and print out the Clover Letter Match, Leprechaun Beginning Writing, and Clover Spelling Puzzle.  
Art/Fine Motor:
  • Leprechaun Feet: This is my favorite!  I wrote this article for Shoe Painting over at eHow.  Follow the directions but use green paint, yellow or white paper, and gold glitter.  So much fun but you will have a mess!
  • Color mixing coffee filter shamrocks:  Cut out clovers shapes from coffee filters, enough for each child.  Give participating children a cup of blue water and a cup of green with a dropper in each (if at home, medicine droppers work nicely).  If using food coloring, the water should have a higher concentration of drops so the color will be more vibrant.  Test it out first.   Have the children drop the colored waters onto the coffee filter shamrock and watch as the two colors blend.  Some may be more blue or yellow then green, but that's OK.  This is their project, not yours!  Let the shamrocks dry in the sun then hang in the window for display.  
    • Variations:
      • Use a paint brush to drip the colored water onto the shamrock.
      • Let the kids color the shamrocks with blue and yellow markers.  Give the children water and a brush and let them "paint" over the marker.  Watch as the colors blend!
  •  "Magic" Crayon Rubbing Shamrocks: Using index cards or posterboard cut out several shamrock shapes of varying size.  With hot glue, outline each shamrock with a thick layer of glue.  Allow to dry.  Once glue is hard, tape the shamrocks to the table (to prevent movement).  Give the children copy paper and crayons with the wrapper peeled off (which you could let them do; they'd love it!) and show them that if they place the paper over the shamrocks and rub the crayon over the bumps, the shamrock will magically appear.  This is a project that is both frustrating and rewarding for the children.  Crayon rubbing is a practiced skill and depending on the age, the child may find it difficult.  Simply be encouraging and what ever they come up with on their project, just let it be. Some may decide to just scribble on their paper in the end, and that's OK too
  • Shamrock Splatter Paint: Over at Amazing Moms they created a St. Patrick's Day Shamrock Card using a splatter paint technique involving toothbrushes.  
  • Cookie cutter prints:  Using paint (green, yellow, and/or white) allow children to stamp shamrock shaped cookie cutters onto paper.  Sprinkle with glitter for added fun.   
  • St. Patrick's Windsock: Decorate construction paper using the cookie cutter prints (above).  Along the bottom of the sheet of paper, have the children glue strips of green or rainbow colored streamers so they are hanging down.  When glue is dry, roll construction paper into a cylinder shape and staple.  Tie string or yarn at the top so the wind sock can be hung or the children can run with it in the wind.
  • Handprint Leprechauns from Meet the Dubiens.
  • Rainbow Hangers: Cut out cloud shapes from white construction paper.  Supply children with streamers in rainbow colors and have them glue the streamers to the cloud so the streamers are hanging down.  Hang clouds around the classroom.  
Math:
Cooking:
Sensory: 
  • Green Shaving Creme: add some green food coloring or liquid watercolors to shaving cream and let the children play.  If you add a bit of glue and give them construction paper it can be an art project too!
  • Place Easter grass or shredded green paper in the sensory table.  Add some fake gold coins and let the children go on a treasure hunt.  
  • Green and Gold Sensory Tub from No Time For Flash Cards
  • Green Goo: mix 1 cup cornstarch with 1/2 cup water and a few drops of green color.  Let the children explore the goo with spoons and their fingers. 
I hope you will find use for all of these projects.  And please feel free to add more in the comment section.  I'd love to hear from you!

Saturday, March 5, 2011

The Evolution of Water Exploration

While searching for my blog posting this week, my posting found me.  While enjoying time with some other mom's and my son, I unknowingly documented the evolution of curiosity and exploration; science in it's most basic form.  It went a little something like this:


First, we start by observing the water using objects.  Touching with a stick, tossing in leaves or rocks are all early stages of exploration.  It's about what will happen to those objects.  Do they get wet?  Do they float or sink?  Would the same happen to me? 


 The next stage is testing the boundaries.  "Will mom/teacher mind if I stick my hands or feet in?"  If it's a nice day, why not?  This is science after all!  


Since further exploration has been okayed, the next stage is discovering what the water will do to them and how it feels.  Usually hands go in first, but in this situation, it was the feet.  
 

He's discovered that his pants are soaking up the water causing more of him to be wet then what's emerged. 


Now let's see how it feels on our bare skin.  Also, what's down there?  Anything interesting? 


Now we test movement in water.  What happens when I run in it?  What happens if I jump?  Will I splash anybody?  How big of a splash will I make?  


Finally, all inhibitions are lost.  Our discovery is water is wet and fun.  Some items float, some items sink.  When I jump into the water, I make a bigger splash then simply running in the water.  If I jump from a higher place, my splash is bigger then if I stand in the water and jump.  Water makes my clothes and shoes wet.  Water makes me wet!   

Sometimes we forget to let our children explore and experiment.  We can get so caught-up in the what-ifs that we forget what it was like to discover new things as a child.  Sometimes we just need to sit back and let our kids be kids.  You'll be surprised by what they learn if you do.

Friday, February 25, 2011

Baking with Kids: Homemade Pop Tarts

My blog this week was inspired by my wonderful mom's group and the food challenge we were given to make homemade pop tarts.  Now, I am a big believer in allowing my kids to help in the kitchen.  My son loves to help me make breakfast and both my kids enjoy assisting me as I bake.  This is a precious time where I can not only spend time with my children, but teach them as well.  The kitchen offers lessons in math, physical science, creativity, and life skills.  With that in mind, my son joined me in my mission to create my own pop tarts.
  
Honestly, I decided to join in this challenge at the last minuet.  So we started our experiment with homemade pie crust.  Some recipes online used pastry dough, but those require refrigeration.  I was making a larger amount of tarts to share with my group, so I doubled the recipe.  


After following the basic directions, and rolling the dough, I cut the edges using a pizza slicer.   This dough I was only able to split in half.  Most of the times I cut it in thirds.  


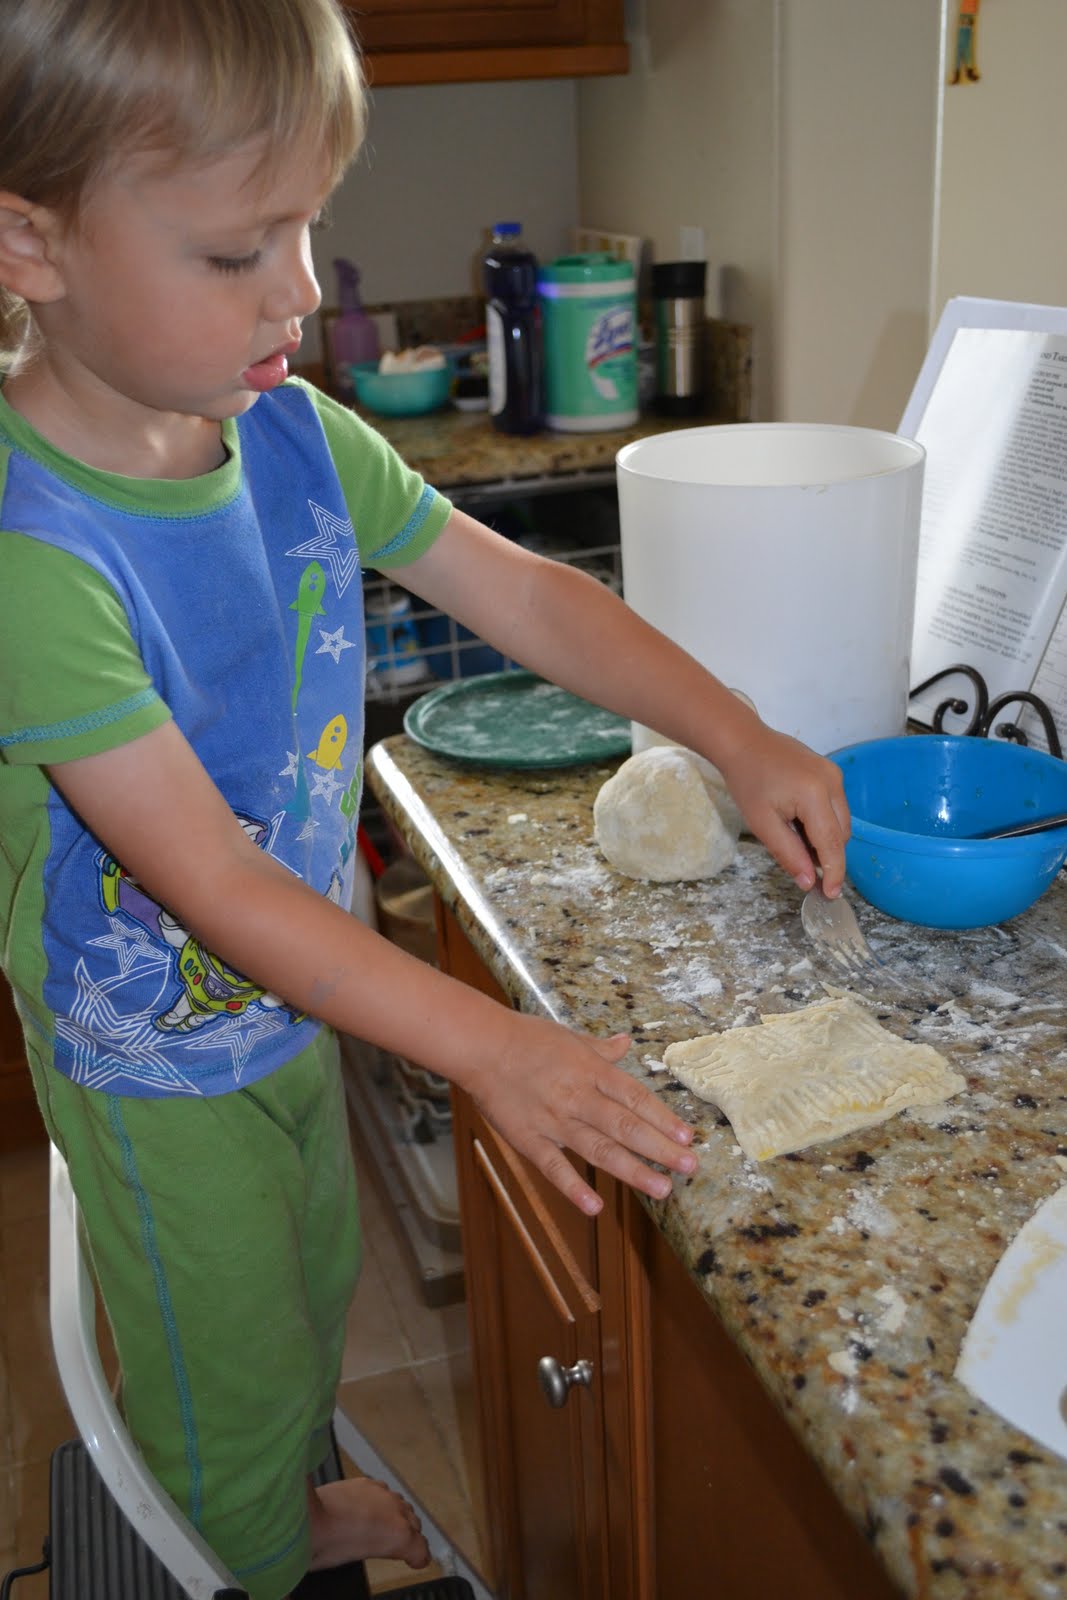
My son then applied an egg wash (beat 1 egg) to the strips of dough so they would stick together.  He said, "Ewwww, yucky!"


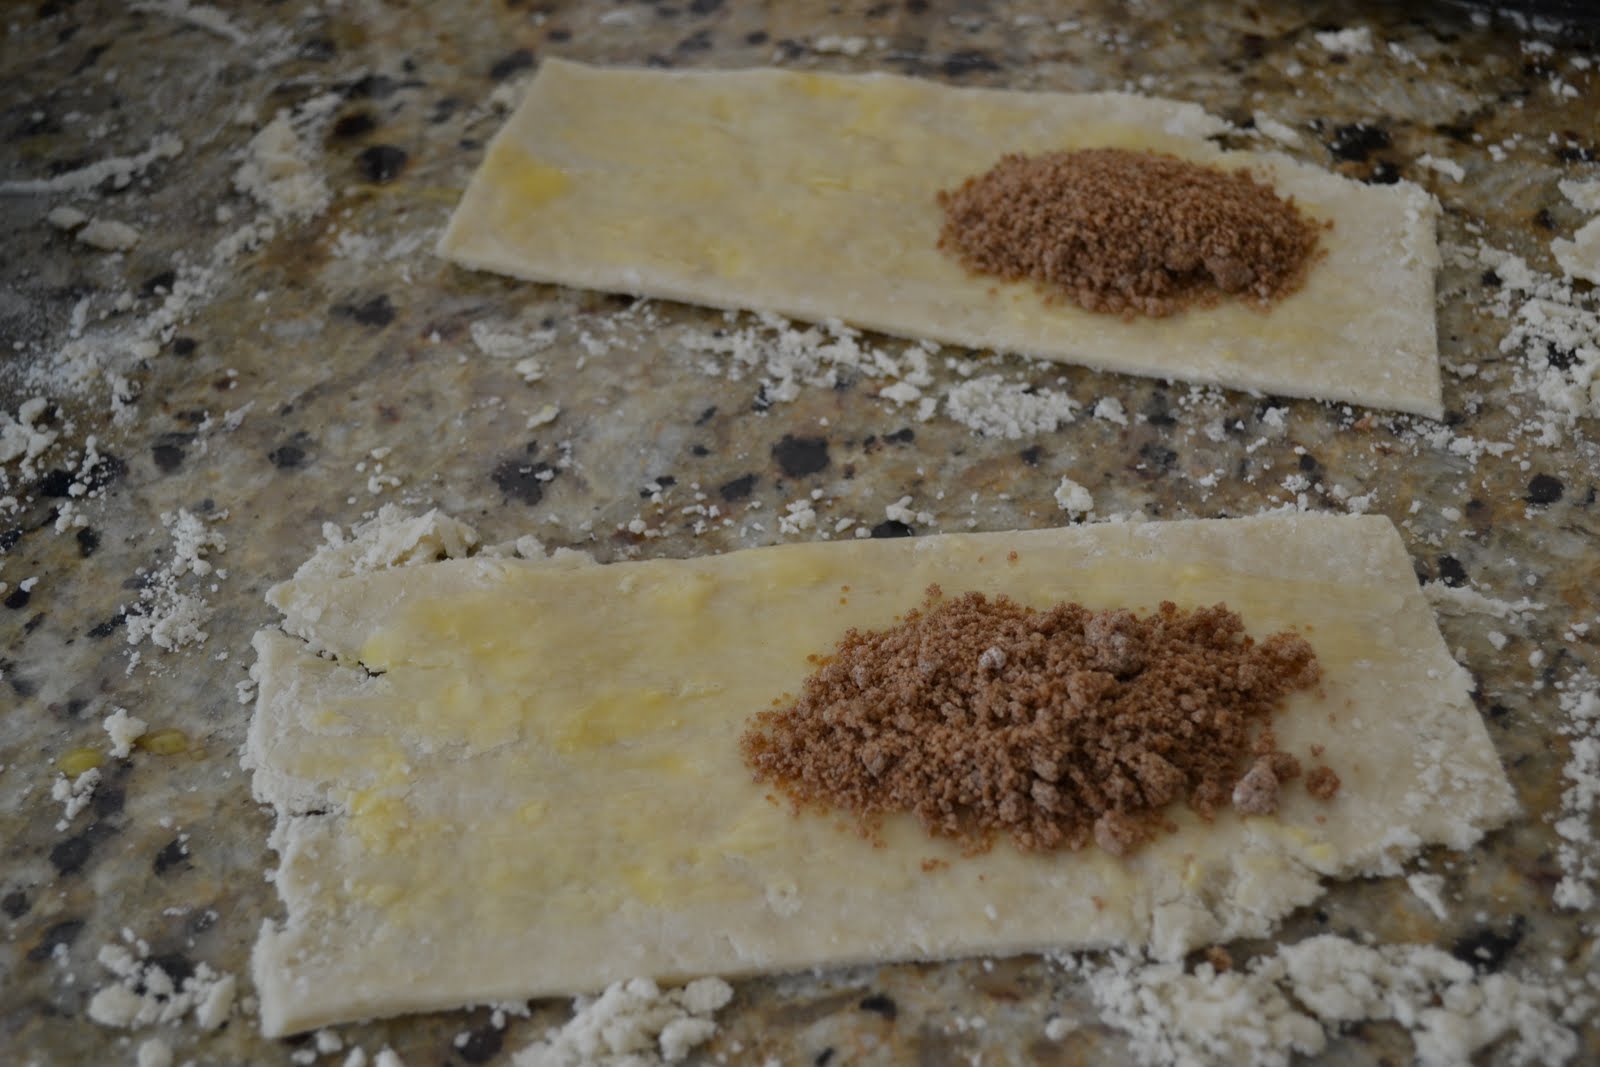
Prior to the egg wash I mixed up a filling of brown sugar and cinnamon which I found from Smitten Kitchen (I did not double their recipe).  They have a variety of filling choices but this was always may favorite as a child.  After the egg wash, I piled the filling in the center of half the dough. Keep in mind you'll be folding the empty half over.


After applying the filling, fold the dough over and gently press the sides down.


After folding the dough, dip the fork into ice water (which you may have left over from the crust) and press around the edges, sealing the dough and filling.

  
Then poke a few holes in the top to vent.


Egg wash the top and sprinkle with sugar.  Bake at 350 degrees for 20 min.  Enjoy warm.  If you have any left over, you can pop them into the toaster (just like the original!) when you are ready to eat them.  

As most children are when they help their parents, my son was proud to have created something he could eat.  He also gains sensory exploration in taste, site, touch, and smell (science), is learning measurements (math),  discovering that heat changes things (physical science), and developing fine motor skills.  Not bad for such a tasty treat!            

Friday, February 18, 2011

STEAM Remote Control Art


*This post contains affiliate links

After reading about "drawbots" on Irresistible Ideas for Playbased Learning I was inspired to create something of my own.  My son has several remote control vehicles and after applying the right amount of tape and markers, we created our own RC "drawbots". This is a fantastic STEAM activity for preschoolers, especially if you have several vehicles or wind-up toys to use for this art experiment.


Our first prototype was a fire engine with 4 markers taped in various places around the truck. Make sure whatever vehicle you use, the tips of the markers are lightly touching the paper.  This is likely through bit of trial and error.  

The remote was very simple for this vehicle; it was specifically designed for a preschooler.  The truck went forwards and in circles creating a modern masterpiece!  We used a large pad of newsprint paper which was given to us.  Opening the paper pad created a larger creative space. Of course the most difficult part is keeping the vehicle on the paper.  


Our 2nd prototype was a non-RC train. It's the type of vehicle you pull backwards and let go in order for it to move.  It didn't travel very far and was a dud.


Our third prototype was an RC spaceship.  The drawback with this vehicle was as soon as you turn it on, it moved forwards.  You have to be quick on the remote or the spaceship leaves the drawing space.  It was too difficult to control in this situation.  


The winner of our STEAM drawing project was the firetruck!  Easy for a preschooler to use and it was fun to draw multicolored circles.  If you wish to try this at home, I suggest large pieces of paper or cardboard.  A roll of paper would work as well.  My driveway was very colorful afterward, but I figure, that's what rain is for!     

Materials:
  1. Remote control vehicles
  2. Markers (scented would be fun!)
  3. Large Pad of Newsprint or Easel Paper Roll
  4. Tape
I hope you and your child enjoy this STEAM project.  Let me know how it goes  Find a creative RC unit to experiment with?  Share your pictures on my Messy Kids FB page! 

Friday, February 4, 2011

Playdough: More Then Squishy Fun

Playdough is more then a creative outlet for budding sculptures.  It is one of the simplest ways to develop fine motor skills in your preschooler.  All that squishing, rolling, cutting, and pinching gives your child's writing muscles a good work-out, even before they start writing!  Plus, it can keep even the shortest attention span busy for say, 10 minuets (enough time to brush your teeth and hair or make a quick lunch).  For busy, working moms, store-bought playdough is good.  But I recommend making your own.  It's softer and versatille (see "optional"), plus if you let your little one be involved in the process, you are throwing in a basic science lesson about heat and change too.  Double bonus!

Here is my favorite recipe:
Materials: 
3 cups flour
1 cup salt 
6 tsp. cream of tartar
3 cups water
3 tbsp. oil
food coloring of choice (or liquid water color)

Optional: glitter, scents (rose, lavender, orange, peppermint, etc.)

Mix all ingredients in a large pan over low to medium heat.  Use a whisk as you gradually add the water to the dry ingredients to help prevent clumps.  Stir until mixture forms a semi-sticky ball.  Remove from heat and knead until smooth.  Store in an airtight container. Gallon Ziploc bags work well. 

Additional ideas for playdough exploration:
  1.  Scissors:  Ever buy kids scissors that don't work?  They will work with playdough!  Kids love cutting playdough, plus your exercising those fine motor skill muscles again!
  2. Loose items: Buttons, google eyes, pipe cleaners, straws, plastic flowers, beads, and more!  Be creative.  
  3. Garlic Press:  My dad taught me to use a garlic press to make hair for my playdough creations when I was a child.  My kids make worms with it.  What will your child create?  
Do you have more ideas for playdough?  I'd love to hear them!  Please share with us by leaving a comment below!  

Lessons in dough:
  1. Dramatic Play: Give your child a cookie sheet, rolling pin, plastic bowls, apron, cookie cutters, utensils, and anything else you can think of.  They can play bakery!  
  2. Science: Making playdough is a lesson in physical science.  Your child will observe how heat changes the ingredients from a gooey mess to a more solid state.  When you add scents to your dough, your child is also exploring their senses; let them explore all 5 of them (unless you add glitter, then no tasting!)
  3. Holidays/Seasons:  Use peppermint scent at Christmas and make red or green dough.  For Valentines day, make red or pink dough with glitter.  In March make green dough with green glitter.  For spring, add some floral scent and make your dough pink, lavender, light blue, or yellow.  And in the fall, add some cinnamon or pumpkin pie spice and make orange dough.   
Do you know any additional lessons for playdough?  I'd love to hear them!  Please share with us by leaving a comment below!   

LinkWithin

Related Posts Plugin for WordPress, Blogger...