Pages

Showing posts with label sculptures. Show all posts

Wednesday, August 10, 2011

It's Playtime: Ice is Nice


For many of us in the Northern Hemisphere, the Dog Days of Summer have arrived and ice play is everywhere on the web as we attempt to stay cool.  Last weeks It's Playtime link party was our most popular to-date, and it seemed to me, ice play/art was a favorite topic for bloggers to share.  This week, I've chosen some of my favorite ice projects from last weeks play date.  Enjoy....and stay cool!

I loved this Artsy Ice Experiment from Creative Connections for Kids.  They blended science with art (color mixing) and had nature (the summer sun!) do all the dirty work for them.  A great summer experiment!

Pre-school Play shared with us that sometimes planned projects take on a life of their own when a preschooler becomes involved.  A typical ice cube painting project quickly turned to Ice Cube (Body) Painting when this little one decided to explore her medium.  I wish I could paint my body and people think it's cute!  

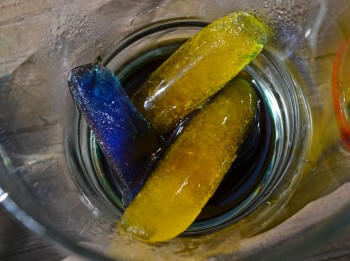
A Salt and Ice Extravaganza came from Praises of a Wife and Mommy.  Salt is great for creating crevices in ice chunks.  Add some color and you have an artistic chemical reaction!  

The Chocolate Muffin Tree took salt and ice exploration one step further and created some lovely, Colorful Ice Sculptures.  I love the giant blocks of ice the little cubes and the big cubes created once they melted together.  

Honorable Mentions: 
The Iowa Farmer's Wife: Ice Play  (perfect for toddlers!)
Dimples & Giggles: Painting with Colored Ice
Walnut Acre: Farm Animals in Ice

If you were featured this week, don't forget to grab your special "featured button."


Now, on to this weeks play date! 
It's Playtime is a community and Thursday link-up hosted by:

* Rachele : Messy Kids (That's me!)
* Anna : The Imagination Tree
* Rachel : Quirky Momma
* Jamie : hands on : as we grow
* Jenny : Let the Children Play

How to Play :
* Link up a post about a playful learning experience enjoyed by kids.
* Give us love and pop a button into your post/blog. Invite your readers to the weekly play date!


* Stop by one of our blogs every Thursday and add your link about play. Your link will show up on each of the blogs in the It's Playtime community.

* Each week the playtime hosts will choose favorite posts to feature. (By linking you are giving us permission to use an image and link to you, if featured.)
* Be sure to visit some of the links that catch your eye. Commenting on posts that you find interesting or inspiring is a wonderful way to develop your own playful community.

Sunday, April 17, 2011

Egg Shell Sculptures


My husband has been incredibly patient; I've had a bowl of egg shells sitting on my counter for months, waiting for this project.  Yesterday was finally the day the kids and I were all free to do something together.  It was a beautiful, warm day, so we opened the garage door for shade, laid out a tarp, and commenced with our art projects (they also made some canvas paintings; blog posting to come later).  To prepare for this project, you will need to save a desired amount of egg shells.  I recommend boiling and bleaching them to protect against Salmonella.    
 For the first part of this project you will need the egg shells, a piece of cardboard or posterboard for sculpting on, and glue.  I cut squares from an old cracker box for the sculpture.
The kids squeezed glue over the cardboard (lot's is good!)  Then they placed the shells where they choose. (My daughter painted my son's face and arms with face paint, so if he looks extra messy, that's why :)   
Michael started with a big piece.  I told him little pieces were OK too, so he broke some shells into smaller scraps. 
Ariel decided on small bits.
Once Michael had filled up his cardboard with shells, he added more glue to ensure they would stick. 
Ariel tried to move her sculpture, but some shells fell off, so she too added more glue. 
Ariel's 1/2 finished project.  Now the glue needs to dry a bit before you being painting.  We set ours in the sun to speed the drying process.   
Once the glue is dry, the sculpture is ready for paint.  Ariel squeezed her paint over the shells.
Then she added glitter to the wet paint for extra sparkle! 
Ariel's finished sculpture.  
Michael chose to paint using a brush.  We used another piece of the cracker box for a paint palette.   
He used the minimalist approach with the paint. 
 Then he added glitter.   
  Luckily, his glue was still wet, so the glitter stuck.

Artistic inspiration can come from anywhere!  What strange items have you or your kids created art from? 


LinkWithin

Related Posts Plugin for WordPress, Blogger...