Pages

Showing posts with label holidays. Show all posts

Wednesday, January 27, 2016

Process Art for Groundhog Day


*This post contains affiliate links

Most kids like the idea of Groundhog idea; the idea that an animal can predict the coming of spring.  It's fun to think about and fun to "celebrate" at home or at school.  But when you search Pintrest for "Groundhog Day Activities" or "Groundhog Day Crafts" you find a lot of printables and fairly difficult craft projects that simply aren't appropriate for toddlers and young preschoolers.  I do love this Negative Art project from Tippy Toe Crafts, which is shadow-like, but still not process art.

Volunteering at The Duck Pond has many advantages.  One is being the large amount of arts and craft supplies the founder has collected over the years.  Being the artsy one in the group, I get to design the "make & take" projects used each week.  Working on February's projects, Groundhog Day stumped me.  We don't use printables at The Duck Pond and I'm trying to move our art towards more process and less craft, which is far more stimulating to the average 2 year old.  So I ventured into our supply room and pondered colors and materials that could represent Groundhog Day.  A simple yarn collage was the result.


I gave my daughter some supplies: various earthy shades of yarn, a piece of paper, and some glue.  My daughter, being a typical toddler, loves glue, and was immediately excited at the prospect of using more (she'd already done the weekly project earlier, which took a lot of glue).  She squeezed glue all over the paper and set out to piling the yarn on top of the glue.  I showed her that unless there is more glue, the piles of yarn won't stick.  She understood and spread things out a bit.


The beauty of this project is in it's simplicity.  Even young toddlers can explore the yarn and glue to create whatever they want.  If you are nervous about the amount of glue your child might use, then squirt some on the paper and allow your little one to add the yarn.  But I encourage you to let them do as much as possible, because that's the point of process art; it's not about the finished product, it's about exploring the materials and creating what the child desires.  Try to step back and give them the freedom to use their imaginations.

Materials:
  1. Yarn (earthy tones if you want the Groundhog Day theme). Cut yarn into various lengths. 
  2. Half sheet of Construction Paper
  3. School Glue
Enjoy watching your child and feel free to share their finished projects on my Facebook Page.


Friday, May 10, 2013

DIY Mother's Day Pillowcases


I know, I know, Mother's Day is only a few days away but maybe you haven't quite figured out the right gift.  Or maybe, you've been so busy running around, taking the kids here and there, fixing dinner, caring for a baby, and simply going crazy with how busy you are that you suddenly remembered Mother's Day, and OMG, you haven't bought gift!  As a mom, time can get away from us, and before we know it, gift giving holidays are upon us and we have no idea what to do that is both meaningful and practical.  Sometimes, simple is fantastic, and homemade is way more special then an iTunes gift card.  Here's our simple, messy, fun, meaningful, inexpensive Mother's Day present my kids and I created for my mom and my step-mom.      

You will need:
  • A pillow case (whatever thread count you desire, white is best)
  • Fabric safe paint (we used acrylic because I have a ton of it and because I knew my moms wouldn't be using these pillow cases for everyday sleeping)
  • Fabric Markers (I borrowed some from my son's preschool class)
  • Cardboard to place inside pillow case during painting (old cereal box, cracker box, posterboard, etc)
Instructions:
  • Place the cardboard box inside the pillowcase to prevent the paint from bleeding and sticking to the opposite side of the pillowcase.  
  • When the kids have chosen their preferred colors of paint (1 color per kid), coat both hands and have them stamp them onto the pillowcase in desired fashion.  Be creative!  As you can see in the picture, I had my oldest stamp her hands further apart with my son in them middle, but you may have an idea that suits you better.  
  • There are a couple ways you can do your "kisses":
    • Have the kids put lipstick on and kiss the pillowcase.  Then using fabric paint or fabric markers, go over the kiss to make it permanent.  
    • draw some lips with fabric markers (as seen below)
    • If your kids are really daring, and the paint is non-toxic, have them coat their lips with the fabric paint and kiss the pillowcase (good luck with that!) 
  • Use the fabric markers write "Hugs and Kisses for Grandma."  You can also record the date, kids names and ages (see below), or whatever personal information you want to include for memories.  
  • This project needs drying time!  If you are in a crunch, place it in the sun to speed things up.  


Happy Mother's Day to all you moms out there.  I hope you find some time to relax, even if that means using the toilet all on your own.  

Wednesday, March 20, 2013

Eggcellent Fun on It's Playtime

Easter activities are in full swing: eggs, chicks, bunnies, they're everywhere!  Thanks to all of our friends here at It's Playtime, you can find a good chunk of those activities shared on our linky.  Thank you to all of those who joined us for last week's play date and shared your wonderful projects.  This week I'm featuring EGGS, EGGS, and more EGGS.

Over at Putti's World, the girls created 3D Easter Egg Decorations using contact paper and tape as the canvas.  Creative and decorative!

Don't let the name fool you.  These Jello Eggs from Momma's Fun World look sweet but  are a bubbly science project your kids are sure to enjoy.

Do you have a ton of plastic eggs you don't know what to do with?  Try making these Yogurt Berry Popsicle Eggs found over at Play Eat Grow.

If you were featured this week, don't forget to grab your special "featured button."


These activities plus more can be found over on the It's Playtime Pinterest Board.  Happy Pinning! 
Now, on to this weeks play date! 
It's Playtime is a community and Thursday link-up hosted by:

* Rachele : Messy Kids (That's me!)
* Rachel & Holly : Quirky Momma
* Jillian: A Mom With a Lesson Plan

How to Play :
* Link up a post about a playful learning experience enjoyed by kids.
* Give us love and pop a button into your post/blog. Invite your readers to the weekly play date!


* Stop by one of our blogs every Thursday and add your link about play. Your link will show up on each of the blogs in the It's Playtime community.
* Each week the playtime hosts will choose favorite posts to feature. (By linking you are giving us permission to use an image and link to you, if featured.)
* Be sure to visit some of the links that catch your eye. Commenting on posts that you find interesting or inspiring is a wonderful way to develop your own playful community.

By linking up you give us permission to grab a picture and feature you here, on a site we write for, on FB or Pinterest.   If we share your link, we will always credit you, send people to your original post and use only ONE photo.

Wednesday, February 13, 2013

Valentine's Day with a K.I.S.S.


*This post contains affiliate links

I see all over the web families who go crazy for every holiday.  While there is nothing wrong with that, after all, I've been known to do the same, something can be said for keeping it simple.  I've had a number of years where money was an issue.  I couldn't run out and buy my kids candy, cookies, stuffed animals, etc.  Pinterest wasn't popular and life was crazy busy.  Instead, I had to keep it simple.  Show my kids that Valentine's Day is about love, not about candy and stuffed bears.

Heart pancakes are incredibly easy, cheap, and what kid doesn't love a shaped pancake?  You don't need a fancy pancake maker to get them.  I use large cookie cutters.  You can use a pancake mix or you can make them from scratch (see below for my recipe), which is not as difficult as it sounds.  Once you are ready to cook, spray the cookie cutter(s) with cooking spray and place them on an oiled, hot pan. Then pour your mix into the molds.  Don't pour too much or they'll be really thick and take forever to cook.  When the first side is browned, gently slide the cookie cutter off the cakes and flip.  Beware, it will be hot!  Repete as necessary.

Simple Pancakes:
1 c all purpose flour
1 tbls sugar
2 tsp baking powder
1/4 tsp salt
1 egg
1 c milk
2 tbls oil
Red food coloring (optional for V-day)
Whip cream and holiday sprinkles (optional)

Combine all ingredients (except whip cream and sprinkles) in a mixing bowl, stirring until blended but still slightly lumpy.  Place heart-shaped cookie cutter on a hot, slightly oiled griddle or skillet.  Pour batter into mold.  Amount of batter will depend on size of cookie cutter.  Cook until surface of pancake is bubbly and the edges are dry.  Flip and finish browning.  Makes 8-10 standard-size pancakes.  Serve with syrup, fruit, or whip cream with sprinkles.        

What's a good pancake without a cold glass of milk?  Valentine it up a bit by serving pink milk.  You could buy strawberry milk or you could simply add red food coloring to the leche of your choice.
See?  Even on a budget, Valentine's Day can be fun.  And of course, don't forget the hugs and kisses!

XOXOXOXOXOX


Wednesday, December 21, 2011

It's Playtime: Let's Celebrate Hanukkah

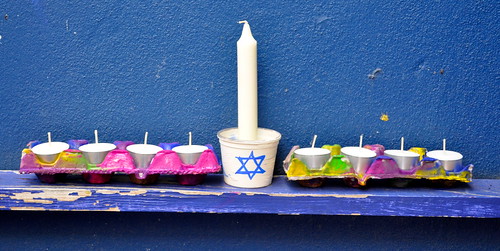
With Christmas fast approaching, sometimes we forget there are other holidays celebrated this time of year.  While my kids are singing Rudolph and Noel, my nieces are learning to play with dreidel and light a menorah.  This week It's Playtime is dedicated to them and the Festival of Lights.

Join Se7en as they Learn About Hanukkah with Dreidels, Menorahs, and Latkes.  Besides their own activities (and a great Letkes recipe), they include several links to other Hanukkah activities.

Inside Out shared a little of how they celebrated Festivals of Light at preschool.  

If you were featured this week, don't forget to grab your special "featured button."   


Now, on to this weeks play date! 
It's Playtime is a community and Thursday link-up hosted by:

* Rachele : Messy Kids (That's me!)
* Anna : The Imagination Tree
* Rachel : Quirky Momma
* Jamie : hands on : as we grow
* Jenny : Let the Children Play


How to Play :
* Link up a post about a playful learning experience enjoyed by kids.
* Give us love and pop a button into your post/blog. Invite your readers to the weekly play date!

 
* Stop by one of our blogs every Thursday and add your link about play. Your link will show up on each of the blogs in the It's Playtime community.
* Each week the playtime hosts will choose favorite posts to feature. (By linking you are giving us permission to use an image and link to you, if featured.)
* Be sure to visit some of the links that catch your eye. Commenting on posts that you find interesting or inspiring is a wonderful way to develop your own playful community.


Next Week: It's Playtime will be on Christmas break.  We will return right after the New Year with more great ideas shared by YOU.   

LinkWithin

Related Posts Plugin for WordPress, Blogger...