Pages

Showing posts with label fine motor. Show all posts

Wednesday, April 19, 2017

Spring Play Dough: An Invitation to Play


*This post contains affiliate links

Play dough is a staple amongst ECE educators.  It's a great tool for imaginary play, exploration, and helps to build-up the fine motor skills needed for writing.  It's also cheap to make.  I often use this no cook recipe from The Imagination Tree. It's what I used in the picture below.  I added yellow food coloring and green glitter  to make it "springy."


The dollar store is a handy resource for cheap exploratory supplies.  If you are like me, and don't go often, Amazon is fantastic too (not to mention it'll be delivered right to your doorstep).  When I go to the dollar store, it takes me forever because I'm hunting for anything I can use for art and sensory activities.  It's amazing what you can find, especially amongst the seasonal items.  And the containers!  So many cute ways to present invitations to play/explore as well as for storing said objects.


For this particular invite, I set out the homemade play dough, sparkly Mini Styrofoam Eggs, silk flowers, and plastic butterflies.  The other play dough tools are all on a low shelf for easy access.


This particular spring themed invitation allows a child to explore concepts of spring: plants/gardening, new life, insects (life cycle), and Easter (if one chooses).  This activity allows for independent play and free exploration of materials.

You may be asking, "what is an invitation to play?" and that would be a great question.  For an awesome tutorial, check out Creating the Invitation to Play on Teach Preschool and Creating Invitations to Play! on The Imagination Tree.  

If you wish to expand this activity through reading, you might try:


Wednesday, April 12, 2017

Color Dripping: Spring Flowers


 *This post contains affiliate links

Recently I purchased some Pipettes because my 4 year old likes to play in water.  I figured, amongst many other things, she could use them for water transfer and creating "potions" outside.  I also know they are great for various art projects and color blending.  While browsing Facebook I came across a beautiful spring art experiment from Fun-a-Day that inspired me to decorate for spring.  So I set to work, which included creating some liquid watercolors.  


While I prefer how vibrant purchased Liquid Watercolors  can be, I didn't have any on hand.  But I did have a bag full of dried markers I'd been collecting.  You can repurpose these old markers by placing their tips in water and allowing them to soak for several hours, or overnight.  Then you can store the created watercolors in small plastic containers.


After creating the watercolors, I cut some coffee filters into flower shapes.  The nice thing about coffee filters is they are thin, so you can cut a number of them at once.  When all was ready, I set out the flowers, watercolors, and pipettes (one for each color) for my preschooler to play with.  I used a plastic box lid to contain the mess as best as possible.  A tray or cookie sheet could also work.  Some kids like to really soak their art work, so keeping it from running all over the place is important for your own sanity.


Pipettes are a great tool for developing fine motor skills.  Toddlers may find squeezing and transferring the liquid difficult.  If this is the case, give them a paint brush.  It'll still create a lovely work of art.


There are several ways you can take this activity.  If you want to teach simple color blending, try using only two colors at a time:

  • yellow+red= orange
  • blue+yellow=green
  • red+blue= purple
If you want to move beyond the basics, try multiple colors.  Some truly beautiful flowers can be created this way.  I explained to my daughter that it's best to mix the colors on the paper, rather then in the containers because otherwise you'll end up with all brown.  Of course, if your child is like mine, they will still test this theory.  I found if you use an ice tray for your colors, rather then giving them the storage containers, you'll waste less, and it can be easily dumped and replenished.  

As much as possible, stand back and allow your child to explore the activity.  It's OK to ask them questions about the colors they are blending but otherwise let them create.  Some may chose to not blend the colors.  That's OK too.  Sometimes the process is more important then the product.  


With Easter around the corner, we also painted some coffee filter Easter eggs.  Once all the flowers and eggs were dry, we hung them in the windows to catch the light and enjoy. 

Here's a list of what you'll need:
  • pipettes or droppers (paint brush for toddlers)
  • coffee filters
  • liquid water colors
  • Scissors (for cutting flower/egg shapes)
Have you used pipettes for color blending before?  Let me know how you did and what you think of this activity.  


Thursday, October 30, 2014

Toddler Friendly Tattooed Pumpkins


It's the night before Halloween and maybe, just maybe you are looking for one more way to decorate your pumpkins.  Something that doesn't require paint, knives, glitter, or glue.  Something you can do with your little one, as well as an older child.  If you are, then I have the pumpkin decorating idea for you!

What you need:
  1. A pumpkin (smoother ones work best but minis work too, as you can see from my picture)
  2. Temporary tattoos of choice
  3. Paper towels or a wash cloth
  4. Water
If you've ever placed a temporary tattoo on your child, you know what to do, except place them on the pumpkin.  It's that easy.  If you've never used temporary tattoos, here's what to do

 
Pick out the tattoo you'd like to place on the pumpkin.  Depending on what you have, like a sheet of designs, you may have to cut around the one you want.  Others come as individuals or with perforations that allow for easy tearing.  Make sure you remove the plastic before placing it on the pumpkin. Place the picture side on the pumpkin with the paper backing facing towards you (see Picture below).
Get your wash cloth or paper towels wet.  Not dripping, but pretty wet, and place over the tattoo, holding it on for about 30 seconds.  Afterwards, carefully peel the paper away from the pumpkin's surface.  If you don't hold the wet cloth on long enough or are too quick to pull the tattoo paper away, some of the picture may tear away.  That's O.K,  you can always wipe the tattoo away and try again.  Or leave it as I did with my daughter.  She was proud to do it on her own so I let it be.  If the tattoo is bunched a bit, simply use your wet cloth to gently rub and flatten the tattoo.  And again, if your toddler is "helping" and proud of what they have done, it's O.K. to leave it as is.  It's about the experience, not the finished product.    

This project can take as long as you allow or as long as your toddler/preschooler is interested.  This was a great mommies group activity and while some of the kids chose to play (while their moms enjoyed pumpkin decorating) a few of the kids (my daughter included) couldn't put enough tattoos on their pumpkin.  Once the pumpkin had enough, my daughter moved to her arms.

Sometimes it's the simplest decorating ideas that inspire us the most.  I've been absent to the blogging world for about 2 years now but it's time for a return.  I hope I can continue to bring you fun and engaging activities for your children and family.  Thanks for joining me again!    

*This activity promotes fine motor skills and counting.  If you have different pumpkins in your house, you could also talk about differences/opposites: Large, small, smooth, bumpy, etc.


Thursday, May 16, 2013

Playing with Nature on It's Playtime


Although the weather has been wacky EVERYWHERE, for most it's a great time of year to get outside and explore nature.  This week on It's Playtime I'm featuring two ways to include nature in your play and learning time.  

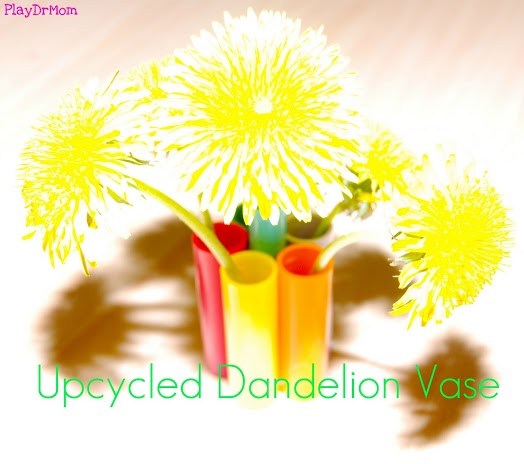
Kids pick flowers.  It is what it is, it'll never go away, deal with it.  Of course we don't want them rummaging around the neighbors flower beds but there are plenty of wild flowers to go around, especially those pesky dandelions.  What do you do with them after they've been shared with you?  Throw them? Stick them in your hair smearing dandelion goo all over (I've had to explain this to my son who insistis every flower he picks should go in my hair). Attempt to keep them in a vase?  There's never a vase small enough....until now.  The genius PlayDrMom shared how she created the perfect Upcycled Dandelion Vase to hold her child's treasured flowers.  It's easy and it's recycling!  DO IT!    


Do you have kids who love to cut EVERYTHING?  Do you have a lawn?  Check out how Raise a Boy uses Cutting Grass to develop fine motor skills.  Even if you don't have a lawn, it's easy to plant grass seeds; bring some nature indoors.  Your child will love this activity whether they are toddlers just learning to use scissors or 5 year olds practicing for Kindergarten.  

If you were featured this week, don't forget to grab your special "featured button."

These activities plus more can be found over on the It's Playtime Pinterest Board.  Happy Pinning! 

Now, on to this weeks play date! 
It's Playtime is a community and Thursday link-up hosted by:

* Rachele : Messy Kids (That's me!)
* Rachel & Holly : Quirky Momma
* Jillian: A Mom With a Lesson Plan

How to Play :
* Link up a post about a playful learning experience enjoyed by kids.
* Give us love and pop a button into your post/blog. Invite your readers to the weekly play date!


* Stop by one of our blogs every Thursday and add your link about play. Your link will show up on each of the blogs in the It's Playtime community.
* Each week the playtime hosts will choose favorite posts to feature. (By linking you are giving us permission to use an image and link to you, if featured.)
* Be sure to visit some of the links that catch your eye. Commenting on posts that you find interesting or inspiring is a wonderful way to develop your own playful community.

By linking up you give us permission to grab a picture and feature you here, on a site we write for, on FB or Pinterest.   If we share your link, we will always credit you, send people to your original post and use only ONE photo.

Thursday, February 28, 2013

It's So Easy, It's Playtime!

Welcome to the weekly It's Playtime link party!  This week I'm featuring two simple ideas for play with items I'm sure you all have laying around the house.  So check out the features, join in the fun, and browse our linky for your next super fun play or art idea.

If you don't have TP laying around the house, well then, you're in more trouble then entertaining a bored preschooler.  Mess for Less shares their towering math game brought to you by Charmin or the TP of your choice.

How about Q-tips and a Colander ?  If you have those two items then you have some simple fine motor play shared by our friends at Fantastic Fun & Learning.  

Ok, after looking over this post, I swear I didn't share these two play ideas just to promote my Amazon account.  I really didn't!  But if you really want to buy a colander, well then, by all means, you should!  If you don't have TP, then I suggest running to the store because you shouldn't wait two days for Amazon to ship it to you.    

If you were featured this week, don't forget to grab your special "featured button." 


These activities plus more can be found over on the It's Playtime Pinterest Board.  Happy Pinning! 
Now, on to this weeks play date! 
It's Playtime is a community and Thursday link-up hosted by:

* Rachele : Messy Kids (That's me!)
* Rachel & Holly : Quirky Momma
* Jenny : Let the Children Play

How to Play :
* Link up a post about a playful learning experience enjoyed by kids.
* Give us love and pop a button into your post/blog. Invite your readers to the weekly play date!


* Stop by one of our blogs every Thursday and add your link about play. Your link will show up on each of the blogs in the It's Playtime community.
* Each week the playtime hosts will choose favorite posts to feature. (By linking you are giving us permission to use an image and link to you, if featured.)
* Be sure to visit some of the links that catch your eye. Commenting on posts that you find interesting or inspiring is a wonderful way to develop your own playful community.

Saturday, August 25, 2012

A is for Apple


School has started and fall is fast approaching.  It's time to break out the alphabet and the apple activities for back to school fun!  

We started our theme with a simple letter trace.  It's great for developing letter recognition and fine motor skills, especially in early writers.  I drew a letter A on a piece of construction paper and allowed my son to choose from markers or crayons (both would have been OK too) for tracing.  Once Michael was done, he pasted on a few apples I had cut for another project.  

  For more letter recognition and word association, Michael glued apples to the letter A.  

We took our art outside for some simple, apple tree inspired easel painting.  I gave Michael red and green paint, along with a brush and a cork and set him free....
 Michael's creation
Later, his older sister joined the fun.

We also made some applesauce together.  Yum, yum!

For more apple activities check out my Apple Themed Pinterest Board!    

Books you can read:


*Disclaimer: These activities are a year old.  Often, I do things with my kids, take pictures, but never get around to blogging what we've done.  I'm lazy, I'll admit it.  You know, I sit around, doing nothing all day....Ok, not really.  I'm usually running my son to playdates, my daughter to art class, assisting with homework, and doing pesky chores like laundry, vacuuming, and cooking.  I figure though, since I'm pregnant and doing less with the kids at the moment, I can catch up on things we did last year so the pictures don't go to waste :)   

This activity shared with:
   
No Time For Flash Cards

LinkWithin

Related Posts Plugin for WordPress, Blogger...